A few months ago the print fan on my Prusa MK3S+ started sounding horrifically loud. I knew it was likely past time to replace it as I knew that some debris had flown in to it about 6 months earlier and damaged the fan. After reading the official method for replacing the fan, I have to say, I was dreading it a bit.
If you haven't read it already, the officially recommend way to replace your print fan can be found at: https://help.prusa3d.com/guide/how-to-replace-a-print-fan-mk3s-mk3s_160876.
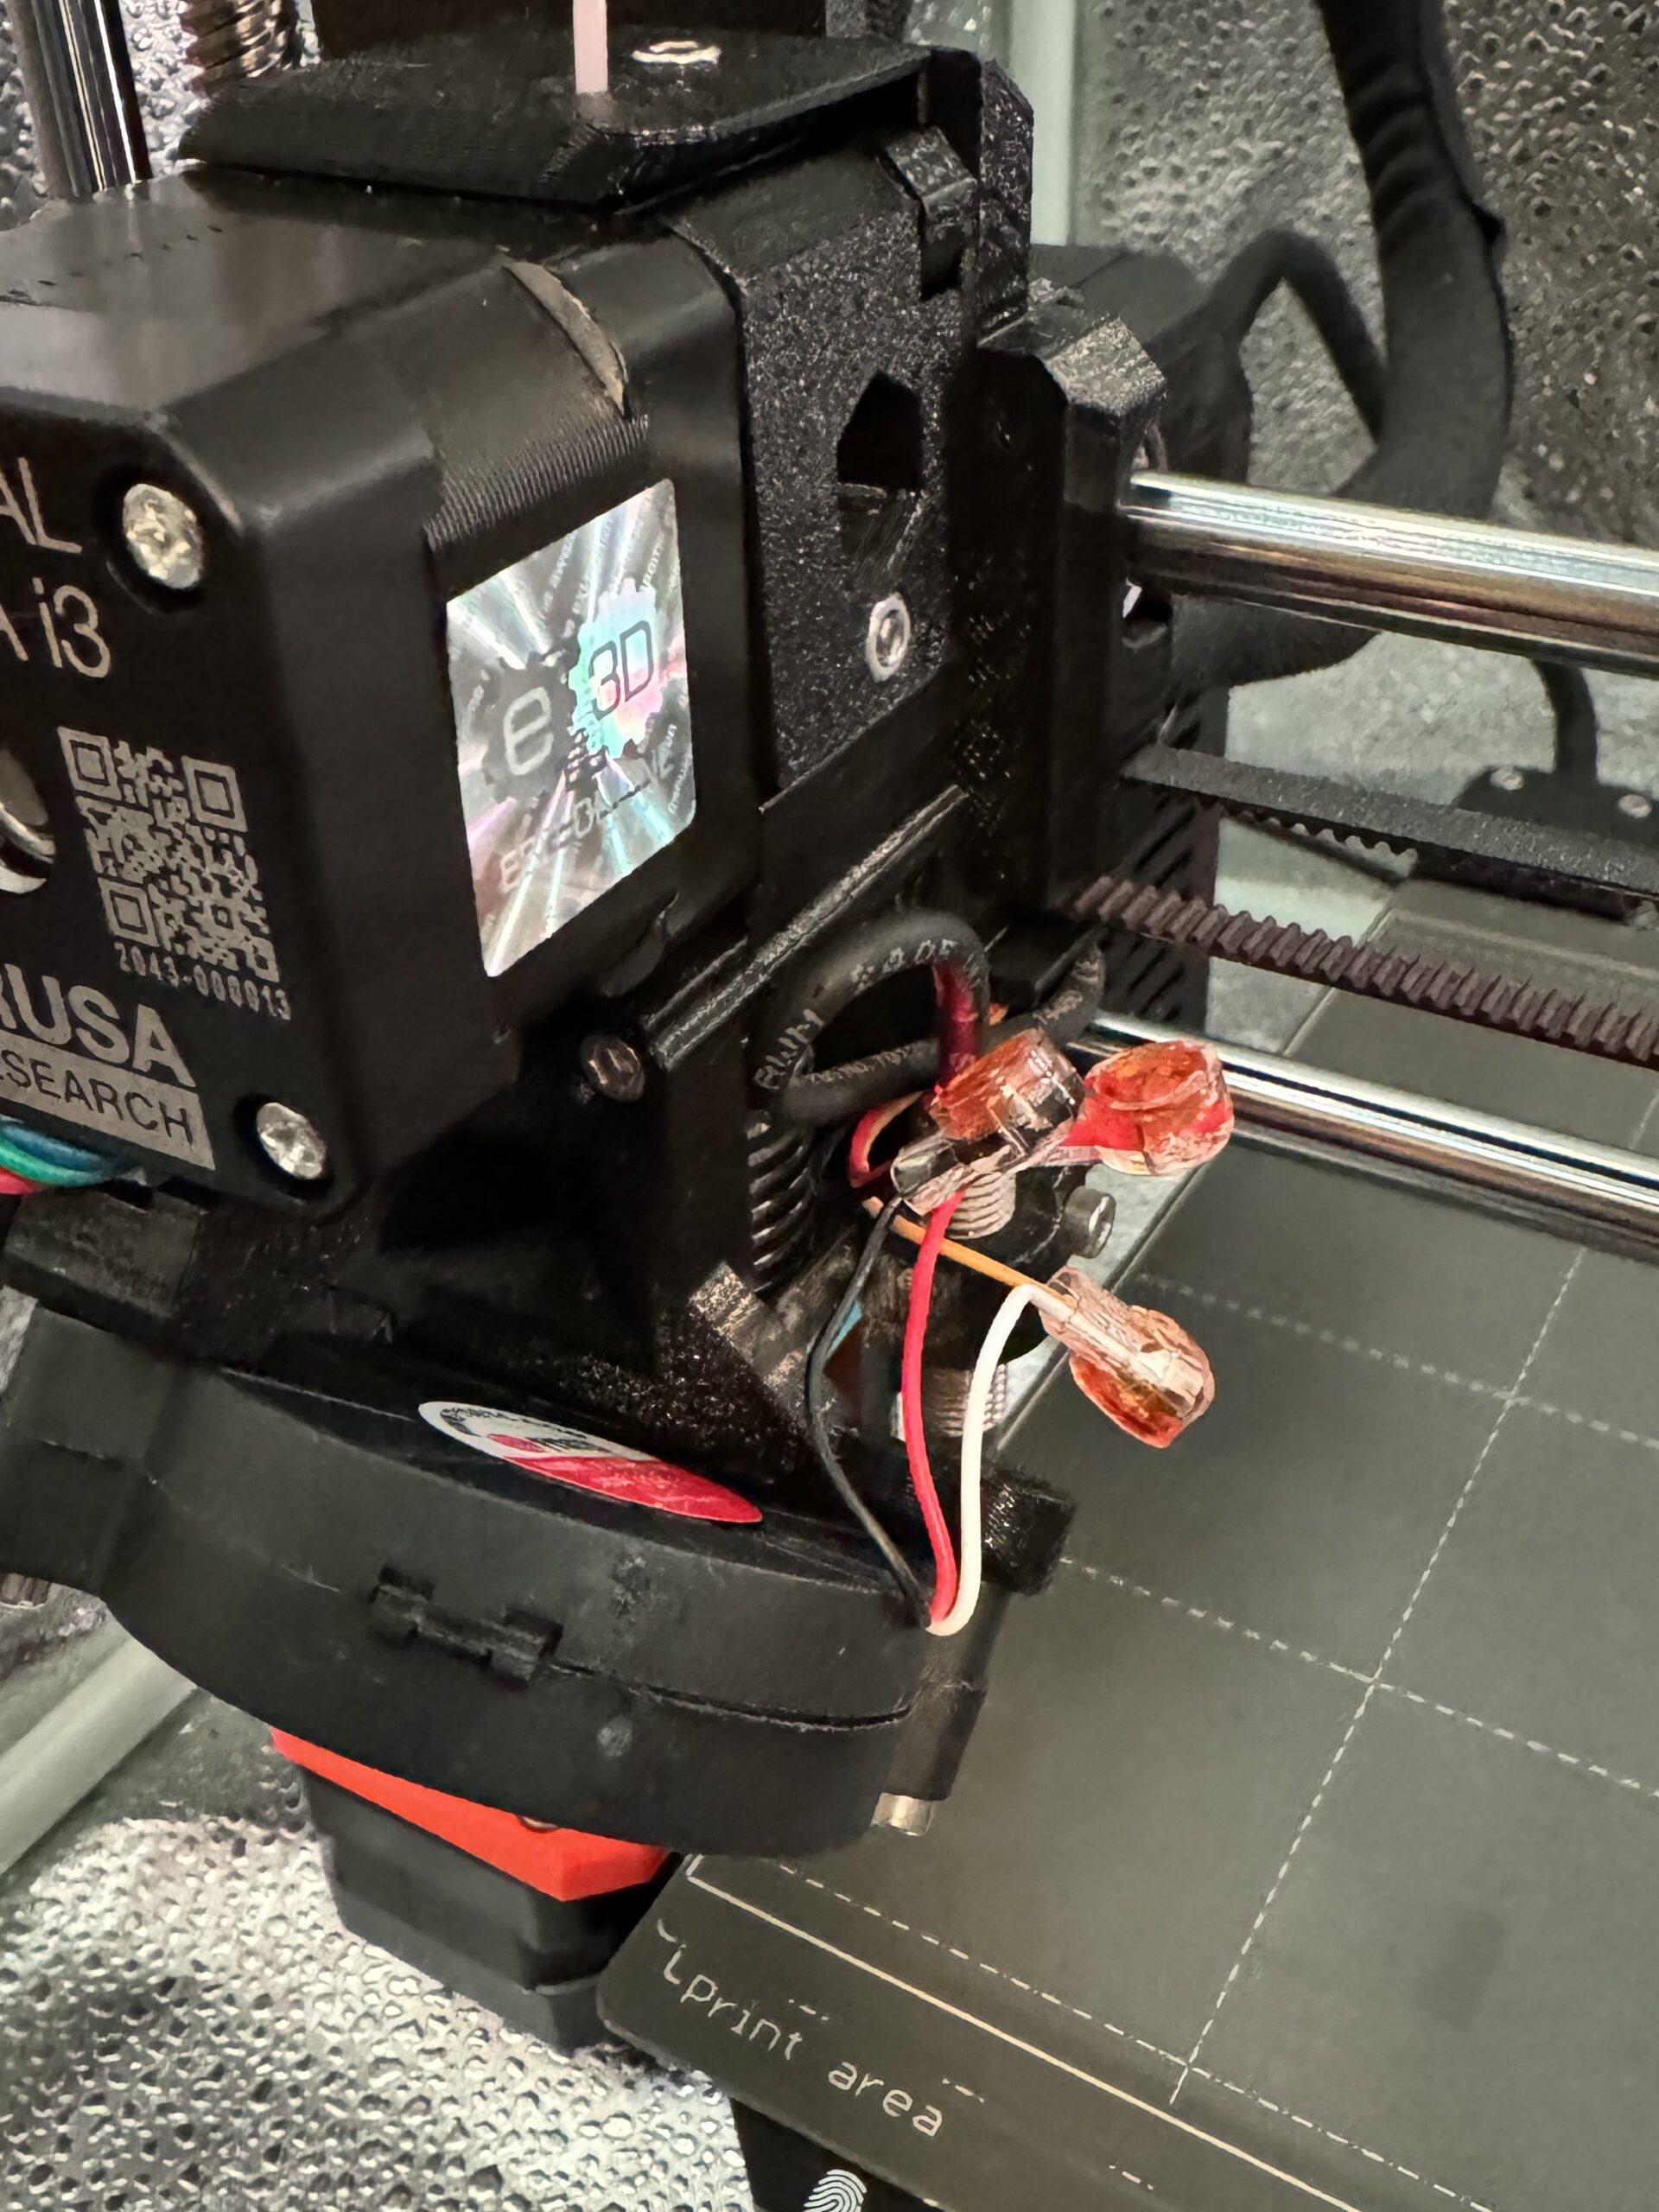
If you peruse that article you will see that it has you opening the case to the Einsy board, disconnecting the cable, and then clipping the zip ties that are around the wire bundle. That gave me pause, because I previously had to replace the hotend, and when I was in the box I slipped and sliced a cable at an angle. To fix that problem, I took an inline wire connector and connected the two sliced wires. So it occurred to me, why not do something similar when replacing the print fan, and not have to dissassemble so much.
So below is my hack for using either IDC 2-wire button connectors or a inline wire connector to replace your old print fan with a new one.
Here’s what you need:
- 2.5mm Allen key
- Klein Tools IDC 2 Wire Yellow connectors
- https://www.amazon.com/gp/product/B008EAK2L0
- You will need at least three of these. But you may want to pick up some exrtras in case you botch one. The link above is to a 25 pack.
- A Prusa compatible hotend printer fan. I went with a Fysetc model based on Amazon reviews
- A pair of small wire cutters
- A pair of needle-nose pliers
- Cloth or fabric roughly 15x15cm to cover the bed of the printer
Step 1: Prepare the Printer
- Remove any filament from the hotend
- Ensure the hotend and heatbed are cool
- Ensure the printer is turned off, and unplugged
- Remove the flexible steel sheet
- Cover the heatbed with a thick soft cloth/fabric
Step 2: Remove the Old Print Fan
- Use the 2.5mm Allen key to remove the two screws holding the print fan to the hotend assembly
- Place the screws to the side, you will need them later
- Take your small wire cutters and cut the three wires near the old print fan body
- If using an original Prusa print fan, these wires may be Red (positive), Yellow (neutral), and Black (negative)
- Discard the old fan
- If the three wires are together, gently separate them
Step 3: Connect the New Print Fan
- Align the new fan to the hotend
- Screw the new print fan to the hotend harness using the two screws you removed earlier
- Cut the wires connected to the new print fan about 76mm (3in) way from the fan
- If the wires connected to the new fan are cover by an outer sheath, then slide the sheath off
- If the three wires are together, gently separate them
- Pull out three of your Klein IDC 2-wire (button) connectors
Step 4: Connect the Wires
- Connect the Black wires be inserting the black wire from the new fan into one slot of a connector and the black wire from the printer into the second slot/channel in the same connector
- Use the needle-nose pliers to press down the button
- Note: The button must be completely flush to ensure the wires are secure
- Gently pull on the black wires to ensure that they do not come free from the button connector
- If they do come free, then repeat the steps above ensuring that each wire is inserted as fully as possible when the button is pressed down
- Connect the Red wires to a connector, the same way you did with the black wires
- Connect the Neutral wires to a connector, the same way you did with the black wires
- Note: the color of the neutral wire may differ between the old and new fans. Typically the neutral is either yellow or white

Step 5: Run a diagnostics
- Set the printer back up for printing
- Turn on the printer
- Go to Callibration menu and run the Selftest
- As the print fan tests runs you may be asked if the “Lefthand hotend fan” is spinning, check on the left hand-side to of the hotend to check before answering.
- You may be asked if the “Front print fan” is spinning, answer accordingly
- By the way, if this fan is spinning, you have successfully replace the old fan!
If your diagnostics passed, then Congratulations! You have succesfully replaced your print fan. Now go grab your favorite snack and enjoy! Afterall, you earned it!